User input
How to save user input and reuse it inside menus.
Activator context
Section titled “Activator context”Almost all activators saves own state for each player. We called this state as Context. Context is any object such a:
- Command which player entered
- Block on which player clicked
- Entity or NPC on which player clicked
- WorldGuard region in which player entered
- etc.
Each newly opened (through activator) menu has own context. AbstractMenus allows to get some values from this context just through placeholders.
Context placeholders
Section titled “Context placeholders”Access to context data via placeholders is possible thanks to Value Extractors. More about value extractors is in the Value extractors section. Here we just describe how to use a specific extractor as a placeholder.
Each activator uses one of the predefined extractors to provide placeholders for its own context.
To get access to an activator’s context placeholders, use a placeholder in the following format:
%activator_<extractor placeholder>%Each activator placeholder starts with the activator_ prefix. The <extractor placeholder> is a placeholder defined by the specific extractor (see Value extractors).
How to use a context placeholder
Section titled “How to use a context placeholder”-
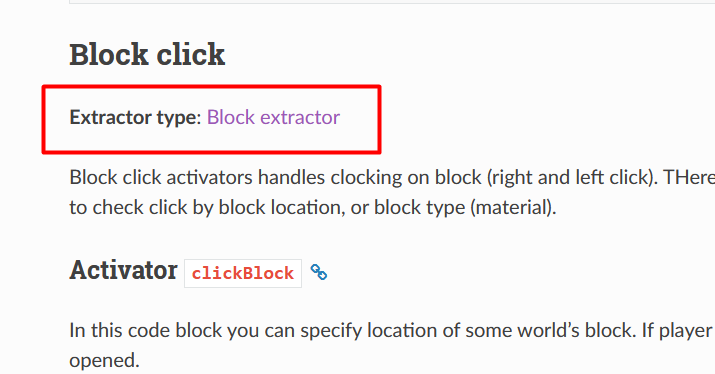
Open the activators reference.
-
Find the activator you’re using.
-
Below each activator there’s a link to the extractor it provides. The extractor’s name doubles as a link to its placeholder table.
-
Click through to the extractor’s placeholder table.
-
Pick the placeholder you need.
-
Prefix it with
activator_. -
Drop the resulting
%activator_*%placeholder into any string in your menu.
Example 1. Using context placeholders
Section titled “Example 1. Using context placeholders”For example, let’s say you use clickEntity activator:
activators { clickEntity { type: SHEEP }}After you clicked on any sheep entity, you can use context placeholders in rules, actions and item properties. Remember, that we use extractor’s placeholders with this format: %activator_<extractor placeholder>%. Example:
title: "Sheep menu"size: 1activators { clickEntity { type: SHEEP }}items: [ { slot: 0 material: CAKE name: "Sheep name: %activator_entity_custom_name%" click { message: "&aCurrent sheep location: %activator_entity_loc_x%, %activator_entity_loc_y%, %activator_entity_loc_z%" } }]Here we used the entity_custom_name, entity_loc_x, entity_loc_y and entity_loc_z extractor placeholders, defined in the Entity extractor reference.
Example 2. Personal profile menu
Section titled “Example 2. Personal profile menu”Let’s create some more interesting menu. We want to make profile menu. When player shift-clicks on other player, we want to open menu with clicked player stats. For this we will use shiftClickEntity activator.
title: "&b%activator_player_name%'s' profile"size: 1activators { shiftClickEntity { type: PLAYER }}items: [ { slot: 4 skullOwner: "%activator_player_name%" name: "&e%activator_player_displayname%" lore: [ "", "&fLevel: %activator_player_level%", "&fXP: %activator_player_exp%", "&fHealth: %activator_player_health%", "", "&aClick, to say hello", ] click { command { console: "tell %activator_player_name% Hello!" } } }]Here, we used placeholder even in menu title, because inventory was created after activator created their context. We also used PlaceholderAPI placeholders, but with activator_ prefix. We do this, because we sure that menu will be opened only after click on player (because we set type: PLAYER).
We used regular placeholders, because Entity Extractor accepts them when the entity is a player. This and other information about each extractor is in the Value extractors section.
Now, if some player will shift-click other player, our menu will be opened:
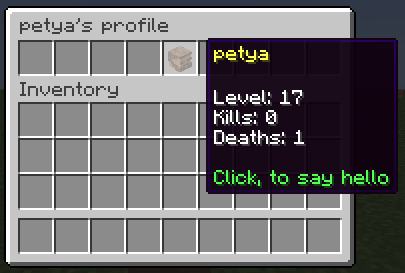
Player’s profile menu example
More complex examples of context placeholders usage are in the Examples section.
Commands building
Section titled “Commands building”AbstractMenus has powerful system to build commands and use entered arguments in menus.
This section covers the more complex form of the command activator with typed arguments. Other information about this activator is on the Activators page.
Command format
Section titled “Command format”To build a command with arguments, declare the command activator as an object. The object has several required and optional parameters:
| Key | Type | Note | Required |
|---|---|---|---|
| name | String | Base name of the command | true |
| aliases | Strings list | Aliases of base name | false |
| error | String | Custom error message | false |
| help | String | Custom help message prefix | false |
| args | Strings list, Objects list | Command arguments | false |
| override | Boolean | Try to override command from other plugin | false |
The error field can contain %s placeholder to insert error message from specific argument.
The help field also can contain %s placeholder to insert generated command help based on command structure.
Example of using error and help fields:
command { name: "mycmd" error: "&cInvalid input: %s" help: "&eCommand structure: %s"}The args field is a list that accepts one of two argument shapes: Simple or Typed.
The command activator uses the Command extractor to surface entered values to placeholders. An example of using this extractor is in the section below.
Simple arguments
Section titled “Simple arguments”Simple arguments is just list of argument keys. Every argument is a string, so user can enter anything. Example:
command { name: "mycmd" args: [ "myarg1", "myarg2" ]}After reloading, AbstractMenus will expect that player will enter command in format:
/mycmd <myarg1> <myarg2>When player entered command and all arguments specified, menu will be opened. Otherwise player receives error message.
To get values which player entered, use context placeholders, as described in Activator context. Just see which placeholders the activator provides and add the activator_ prefix at the start. Example:
message: "You entered %activator_cmd_arg_myarg1% and %activator_cmd_arg_myarg2%"Typed arguments
Section titled “Typed arguments”Typed arguments allows you to expect players to enter arguments of a certain type. If player entered something wrong, he will get error message.
There are several types of arguments.
-
string- Simple string argument. Player can enter anything, without space symbol. -
number- Any number: float or integer. Fails if number cannot be parsed from user input. -
integer- Integers only. Fails if number cannot be parsed to integer from user input. -
player- Online player name. Will suggest all players on tab complete, and fails if player not found. -
choice- Predefined string options. Will be suggested on tab complete. Player must select one of the suggested options.
Each typed argument is an object with parameters. All they has general fields which described below:
| Key | Type | Note | Required |
|---|---|---|---|
| key | String | Unique argument name, which you will use in placeholders | true |
| type | String | Argument type. See all types above | true |
| error | String | Custom error message | false |
| default | String | Default value of argument. Makes argument optional | false |
Example 1. Number argument
Section titled “Example 1. Number argument”command { name: "mycmd" args: [ { key: "amount" type: number } ]}Then to get value from this argument, we will use this placeholder:
message: "&eAmount: %activator_cmd_arg_amount%"Example 2. Choice argument
Section titled “Example 2. Choice argument”The choice argument type required one additional field: options. This is a list of strings. Each element is an option.
command { name: "mycmd" args: [ { key: "variant" type: choice options: ["opt1", "opt2", "opt3"] } ]}Then to get selected option from this argument, we will use this placeholder:
message: "&eSelected %activator_cmd_arg_variant%"Example 3. Player argument
Section titled “Example 3. Player argument”Player argument takes only online player name and suggest these names on tab complete.
command { name: "mycmd" args: [ { key: "username" type: player } ]}Then to get name of player from this argument, we will use this placeholder:
message: "&ePlayer: %activator_cmd_arg_username%"Using regular placeholders for player argument
Section titled “Using regular placeholders for player argument”The player argument has one cool feature. In cases when you use player argument, AbstractMenus saves entered player and provides access to their regular placeholders. Example:
command { name: "mycmd" args: [ { key: "player1" type: player }, { key: "player2" type: player } ]}For example, we need the level of these two players. The Command extractor gives access to this and other placeholders. Following its placeholder format <key>:<placeholder> (see Command extractor), we specify two parameters: the argument’s key and the placeholder we want. We want player_level, so the final placeholder looks like:
%activator_player1:player_level%and%activator_player2:player_level%Default arguments
Section titled “Default arguments”Let’s talk more about default argument’s field. In some cases you need to make some argument optional. For example, you want to make profile menu. If player entered username, then profile of other player will be opened. If no, then will be opened profile of player who entered command.
For logic like this, you can add default value to some argument. You can use regular placeholders in default values. Example:
command { name: "profile" args: [ { key: "user" type: player default: "%player_name%" } ]}If player enter /profile, then user argument will be equal name of player who entered command.
If player enter /profile Notch, then user will be Notch.
Currently, AbstractMenus has a restriction for optional arguments. You can declare only one optional argument, and it must sit at the end of the arguments list. This is due to the argument-parsing algorithm, which can’t tell which argument you entered when more than one is optional.
Final example. Open profile menu by command
Section titled “Final example. Open profile menu by command”Let’s modify the example from Personal profile menu. We’ll replace the shiftClickEntity activator with command and make the command take a player name:
title: "%activator_user:player_name%'s profile"size: 1activators { command { name: "profile" args: [ { key: "user" type: player default: "%player_name%" } ] }}items: [ { slot: 4 skullOwner: "%activator_user:player_name%" name: "&e%activator_user:player_displayname%" lore: [ "", "&fLevel: %activator_user:player_level%", "&fKills: %activator_user:statistic_mob_kills%", "&fDeaths: %activator_user:statistic_deaths%", "", "&aClick, to say hello", ] click { command { console: "tell %activator_user:player_name% Hello!" } } }]We also changed placeholders to fit format, described for Command Extractor. Result you can see below.
Command overriding
Section titled “Command overriding”Sometimes we need to override command from other plugin. For example, you have third-party plugin with /kit command.
Suppose we want to create menu which will be opened by the same command and will show list of available kits. By default, AbstractMenus register command by regular way. This means that any menu command may be overwritten by other plugins.
To override plugin command, you can add override: true parameter to the command activator body. Example:
activators { command { name: "kit" aliases: ["kits"] override: true }}Command with override: true, will be registered as chat listener, not only as regular command. This will allow to “override” third-party plugin command, even if AbstractMenus loaded after this plugin.
When user enter such command, plugin performs it as regular command and cancel next message handling to avoid performing this command by the real “command owner”.
Chat Input
Section titled “Chat Input”Action inputChat allows you to request some text input to player. Below is the structure of this action.
| Parameter | Type | Note | Required |
|---|---|---|---|
| into | String | Name of variable in which data will be saved | true |
| global | Boolean | If true, data will be saved in the global variable. By default is false | false |
| cancelOn | String | A ‘stop word’ or phrase that will cancel waiting for input. If input cancelled, actions inside onCancel will be executed instead of onInput | false |
| onInput | Object | Actions for completed input | false |
| onCancel | Object | Actions for cancelled by stop word input | false |
The only required parameter is into. This is the name of a variable. When the player enters text in chat, the plugin saves it into a variable with the specified name. After that, you can read the variable from anywhere through a variable placeholder.
Basic example:
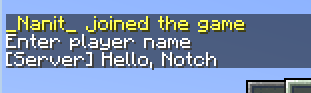
slot: 0material: STONEclick { message: "Enter player name" inputChat { into: "input_username" }}If player clicked on this item, menu will be closed with message. After this, player must write something in chat.
If you want to perform some action, after text entered, you need to use onInput actions block. Example:
slot: 0material: STONEclick { message: "Enter player name" inputChat { into: "input_username" onInput { command: { console: "say Hello, %varp_:input_username%!" } } }}Result:
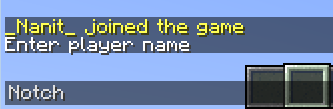
Here, when player entered something in the chat, all players will see Hello, <text>! where <text> is a text, entered by player.
Input Cancelling
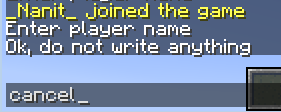
Section titled “Input Cancelling”If you want to add ability to cancel text input, you can add cancelOn parameter to the action. Example:
slot: 0material: STONEclick { message: "Enter player name" inputChat { into: "input_username" cancelOn: "cancel" onInput { command: { console: "say Hello, %varp_:input_username%" } } onCancel { message: "Ok, do not write anything" } }}Here we also added onCancel block to send message to player if input cancelled. If player entered cancel in the chat, plugin will not wait for input anymore, and performs action inside onCancel if it specified.
Restrictions
Section titled “Restrictions”Note, that not all stuff, that available in menu, allowed inside onInput and onCancel blocks.
Since menu is closed while waiting for input, you can only use actions which are not interacts with menu inventory. Do not use actions like refreshMenu, closeMenu, openMenu, etc.
Context placeholder also won’t work inside these action blocks. This is not possible due menu lifecycle, so you can use only common placeholders and variables.