How to create a menu
A short tour through the basic features. By the end of this page you’ll have a working menu opened by a command, with a button that takes money and gives an item.
Where menus live
Section titled “Where menus live”All menu files sit under plugins/AbstractMenus/menus/. The plugin walks the folder recursively, so nesting subfolders for organisation is fine - the file name (without extension) becomes the menu’s unique id.
Directoryplugins/AbstractMenus
- config.conf the global plugin config
Directorymenus
- menu.conf created on first run
- shop.conf
Directorycasino
- blackjack.conf nested folders are fine
- slots.conf
- variables.db SQLite, do not edit by hand
Step by step: your first menu
Section titled “Step by step: your first menu”-
Create the file
Make
plugins/AbstractMenus/menus/menu.conf. The two required keys aretitleandsize.menus/menu.conf title: "My first menu"size: 6title- shown at the top of the inventory.size- number of inventory rows (1 to 6).
Run
/am reload. The console prints:[AbstractMenus] Loaded 1 menus -
Add an activator so players can open it
An activator is anything that opens the menu - a command, an item interaction, joining the server, walking into a region, and so on. The simplest is
command:menus/menu.conf title: "My first menu"size: 6activators {command: "mymenu"}/am reload, then in chat:/mymenu. An empty menu opens.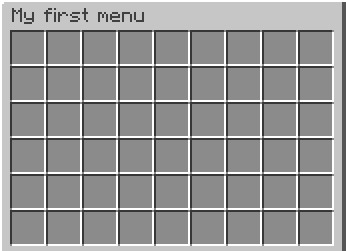
-
Place a button
Buttons are entries in an
items: [...]list. Each entry lives at aslotand has amaterial.menus/menu.conf title: "My first menu"size: 6activators {command: "mymenu"}items: [{slot: 0material: DIAMOND_SWORDname: "&6Excalibur"}]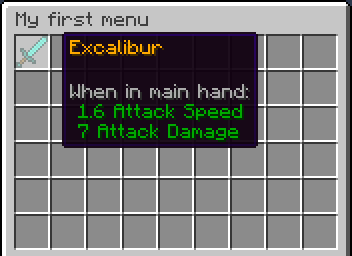
slot- cell index, starting at 0. Other slot formats include ranges and matrices.material- Bukkit material name. Full list on the Spigot Javadoc.name- display name. Supports&colour codes and placeholders.
-
Make the button do something on click
The
clickblock is a list of actions. Start withcloseMenu:menus/menu.conf title: "My first menu"size: 6activators {command: "mymenu"}items: [{slot: 0material: DIAMOND_SWORDname: "&6Excalibur"click {closeMenu: true}}]Reload, click the sword, the menu closes. Different mouse buttons can run different actions - see click types for the full list.
Variations
Section titled “Variations”Show different buttons to different players
Section titled “Show different buttons to different players”Add a rules block to an item. Items in the same slot are stacked - the last item whose rules match wins:
items: [ { slot: 0 material: IRON_SWORD name: "&6Excalibur" }, { slot: 0 material: DIAMOND_SWORD name: "&6Excalibur" rules { level: 10 } }]Player at level 9 sees the iron sword. Player at level 10+ sees the diamond one.
Charge money on click
Section titled “Charge money on click”click accepts both rules (a check) and actions / denyActions branches:
items: [ { slot: 0 material: DIAMOND_SWORD name: "&6Excalibur" lore: "&7Cost: 100 coins" click { rules { money: 100 } actions { itemAdd { material: DIAMOND_SWORD, name: "&6Excalibur" } takeMoney: 100 } denyActions { sound: ENTITY_VILLAGER_NO } } }]What happens on click:
- The player’s balance is checked for 100 coins.
- If they have enough, an Excalibur is added to inventory and 100 coins are taken.
- If not, a no-villager sound plays.
See logical structures for nested rule trees and inversion.
Gate the whole menu
Section titled “Gate the whole menu”Rules at the menu root run before the menu opens:
title: "Admin only"size: 6rules { permission: "i.am.admin"}denyActions { message: "&cYou do not have permission to do this!"}activators { command: "adminmenu" }Players without i.am.admin get the message instead of the menu.