Menu structure
If you already know How to create menu, so here you will learn in details about menu structure and other useful features of the plugin.
Auto refresh
A bit more detailed about the updateInterval property. If you want to create a menu with auto refresh of items, placeholders and any other dynamic data, you can specify the interval for updating the menu. For example:
title: "Dynamic menu"
size: 1
updateInterval: 40
items: [
  {
    slot: 0
    material: CAKE
    name: "Players: %server_players%"
  }
]
The menu above will be refreshed every 2 seconds. Along with this, the item that display the number of players on the server will be refreshed along with the placeholder %server_players%.
In the example above we used the default placeholders. More about placeholders you can find on Placeholders page.
If you want to do some job when menu updated by updateInterval, you can use updateActions block.
title: "Timer"
size: 1
updateInterval: 20
updateActions {
  incVar: "counter:1"
}
In this example, global variable counter will be incremented every time menu updated. In our case, with a period of 1 second (20 ticks).
Note
Actions inside updateActions will be performed before items updates, so if you change some variable inside, the result will be seen immediately.
Inventory type
You can use other types of inventorym not only chest.
For this use type property of menu. This property accepts type name of inventory.
All type names you can find here <https://hub.spigotmc.org/javadocs/bukkit/org/bukkit/event/inventory/InventoryType.html> (for latest Spigot version).
If you use custom inventory type, you can omit a slot property.
Warning
Not every type of invenotry will work. A HOPPER and DISPENSER types will work on all supported MC versions. Other types may work incorrectly.
Below is example of menu with custom inventory type.
Hopper
Code:
title: "Menu"
type: HOPPER
activators {
  command: "menu"
}
items: []
Result:
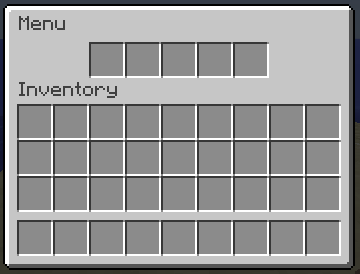
Hopper inventory
Dispenser
Code:
title: "Menu"
type: DISPENSER
activators {
  command: "menu"
}
items: []
Result:
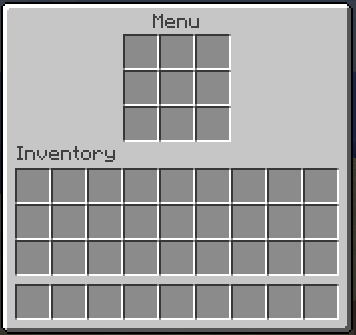
Dispenser inventory